You will need:
Frame
ribbon
screw driver
drill
staple gun
This was so ridiculously easy and took less than an hour. Probably more like 30 minutes. I found this frame from at the thrift store for $1.50. This frame is relatively thick. It sticks out from the wall about 1.5". If you do this, you'll want to look for one about that thick or thicker, so you will have room to get the clothes pins on and off easily.
First you will want to reomve the wire and the d-rings the wire is wrapped around. Throw away the wire but hang onto the d-rings and screws. You will need them later. I thought about painting this, but there is a lot of natural wood by our side entrance and it matched pretty well. In truth, I was feeling lazy this day. If you are feeling more industrious go for it and make it your own
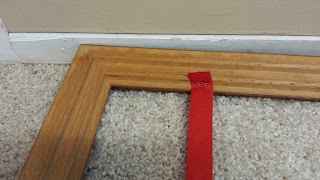
Figure out how many rows of ribbon you want. I opted for three, one for each person in out family. Plus it seemed to be about the right spacing. Next flip the frame over and take some ribbon and staple it to the inside part of the frame. I used inch wide gross grain ribbon because it is what I had laying around the house. This could be super cute with different colors of ribbon. It would probably work with thinner ribbon as well. Just make sure it is wide enough for your staple to grab onto. You want to put the ribbon in the groove farthest from the back of the frame. I had to put my staples angled toward the outside of the frame so they would not stick out the front. This meant I had to put my frame against the wall so that there was enough resistance for the staples to go all the way in. Pull it tight and staple it to the other side. I cut ribbon longer than it needed to be so I would have enough leverage to really pull it tight. It needs to be tight! Do this with all your ribbons.
Next you are going to reinstall those d-rings you held on to. You want to put them so they are on the sides of the frame, at the top but not poking above the top of the frame. Drill some pilot holes and then screw them back in.
And you are done. Hang that bad boy on the wall with some picture hangers (make sure to measure and level so it goes on easily), grab some clothes pins and you have a place to dry those gloves.


No comments:
Post a Comment