Wednesday, November 13, 2013

Refurbished buffet

Here is a recent refinshing project I took on.  I found this buffet at the local thrift store.  It was half off and it spoke to me.  I could see a shadow of its former glory. I had no use for another buffet.  I planned to just sell it when I was done, but I needed to save this piece of furniture. My husband thought I was nuts when I brought it home, but he politely kept it to himself.


I loved the wood grain on the top, the carved details, the art deco handles.  However, as you can see it was in pretty rough shape.  I figured I would have to paint the whole thing, but I was pretty sure I could give it a new life.  I started by peeling of the veneers on the drawers.  As you can see they were not good.  I did this by putting a damp flour sack towel on top of the veneer, and then putting a hot iron on top untill it got nice and steamy.  I then used a putty nive to peel it up.  This took some time and patience, but was pretty easy.  I kept a big bowel of water nearby to re-wet my towel.  Word of warning: this will stain your towel and leave a bunch of residue on your iron.  I have read that the iron will clean up nicely with some steel wool, but I frankly have been to lazy to try and I rarely use my iron for its intended purpose.  So use a towel you don't care about and an old iron if you have one.
Once the veneer was off I used a little wood filler to patch it up and sanded it down a bit. 

Even though I thought I would have to paint the whole thing, I went ahead and started sanding the top, just to see if it was salvageable, and boy am I glad that I did.  I started with 80 grit paper and worked my way up to 220 grit. It sanded down beautifully.  All the water marks and imperfections came out.  So I chose to stain it in a nice dark stain, Moorish Teak, from Zar. Since I already had the sander out, I gave the rest of it a quick sanding to rough it up.  I didn't worry getting it perfect since I was going to use my trusty Zinsser primer


Once the stain was dry, I started taping it off so I could paint the rest of it.  I used my  Zinsser primer so I wouldn't need to sand the entire piece.  Just make sure it is nice and clean.  I primed it and then gave it two coats of Vintage White in satin from Valspar.  I wanted to highlight the carved features of the piece, so I used asphaltum antiquing glaze from Valspar.  This was my first time using this glaze and I read a bunch about the best way to use it.  I opted to slap it on and wipe it off.  I was not a fan of this method on this piece.  It did highlight the carved details, but it also just made it look dirty to me.  It is a bit hard to tell in the picture below, but trust me.


So I repainted the whole piece again.  This time I sparingly used the glaze.  I put a little on the brush then brushed most of it off on a paper towel and then applied it to the detail areas and edges, using a cotton cloth to blend it all.  I was much happier with the results the second time around.


Finally I gave the whole thing, painted and stained surfaces, 3 coats of Varathane water based polyurethane and voila, an amazing piece.  It was hard parting with this piece, but it has already found a good home!


Wednesday, October 23, 2013

Upcycle a Frame into a MItten Rack

So it is late October, and here in Wisconsin, that means winter snow could be just around the corner, and that means wet, soggy gloves and mittens.  Our house is a beautiful arts and crafts style 90 year old home.  I love it!  I would love it even more if it had a mud room.  Alas,  I just have the side entrance which really just opens into the stairwell.  There is not a lot of room.  We have made good use of the space.  There are hooks for coats and pants and bags and a vertical shoe rack on one of the walls, but there really hasn't been a good place to hang those soggy gloves so they are dry and ready for another day of snowball fights in the morning... until now!


You will need:
Frame
ribbon
screw driver
drill
staple gun

This was so ridiculously easy and took less than an hour.  Probably more like 30 minutes.  I found this frame from at the thrift store for $1.50.  This frame is relatively thick. It sticks out from the wall about 1.5".  If you do this, you'll want to look for one about that thick or thicker, so you will have room to get the clothes pins on and off easily.


First you will want to reomve the wire and the d-rings the wire is wrapped around.  Throw away the wire but hang onto the d-rings and screws.  You will need them later.  I thought about painting this, but there is a lot of natural wood by our side entrance and it matched pretty well.  In truth, I was feeling lazy this day.  If you are feeling more industrious go for it and make it your own

Figure out how many rows of ribbon you want.  I opted for three, one for each person in out family.  Plus it seemed to be about the right spacing. Next flip the frame over and take some ribbon and staple it to the inside part of the frame.  I used inch wide gross grain ribbon because it is what I had laying around the house. This could be super cute with different colors of ribbon.  It would probably work with thinner ribbon as well. Just make sure it is wide enough for your staple to grab onto. You want to put the ribbon in the groove farthest from the back of the frame.  I had to put my staples angled toward the outside of the frame so they would not stick out the front. This meant I had to put my frame against the wall so that there was enough resistance for the staples to go all the way in.  Pull it tight and staple it to the other side. I cut ribbon longer than it needed to be so I would have enough leverage to really pull it tight.  It needs to be tight!  Do this with all your ribbons.

Next you are going to reinstall those d-rings you held on to.  You want to put them so they are on the sides of the frame, at the top but not poking above the top of the frame.  Drill some pilot holes and then screw them back in.

And you are done.  Hang that bad boy on the wall with some picture hangers (make sure to measure and level so it goes on easily), grab some clothes pins and you have a place to dry those gloves.


Friday, October 4, 2013

Empty Frames as Wall Art

After two years in our home we still have lots of empty wall space.  Buying art just doesn't seem to be a priority. Plus finding something both my husband and I agree on can be nearly impossible.  One day while watching TV (Longmire, I think),  I saw that the show's living room had empty frames on the wall as art.  I thought it was a fantastic and ecomnomical idea.  So I set about making it work for my space and convincing my husband that my wacky idea was a good one.  The example I saw on the TV just had three large frames painted three different colors.  My husband was not a fan of the tri-color idea, but he was open to the general concept.

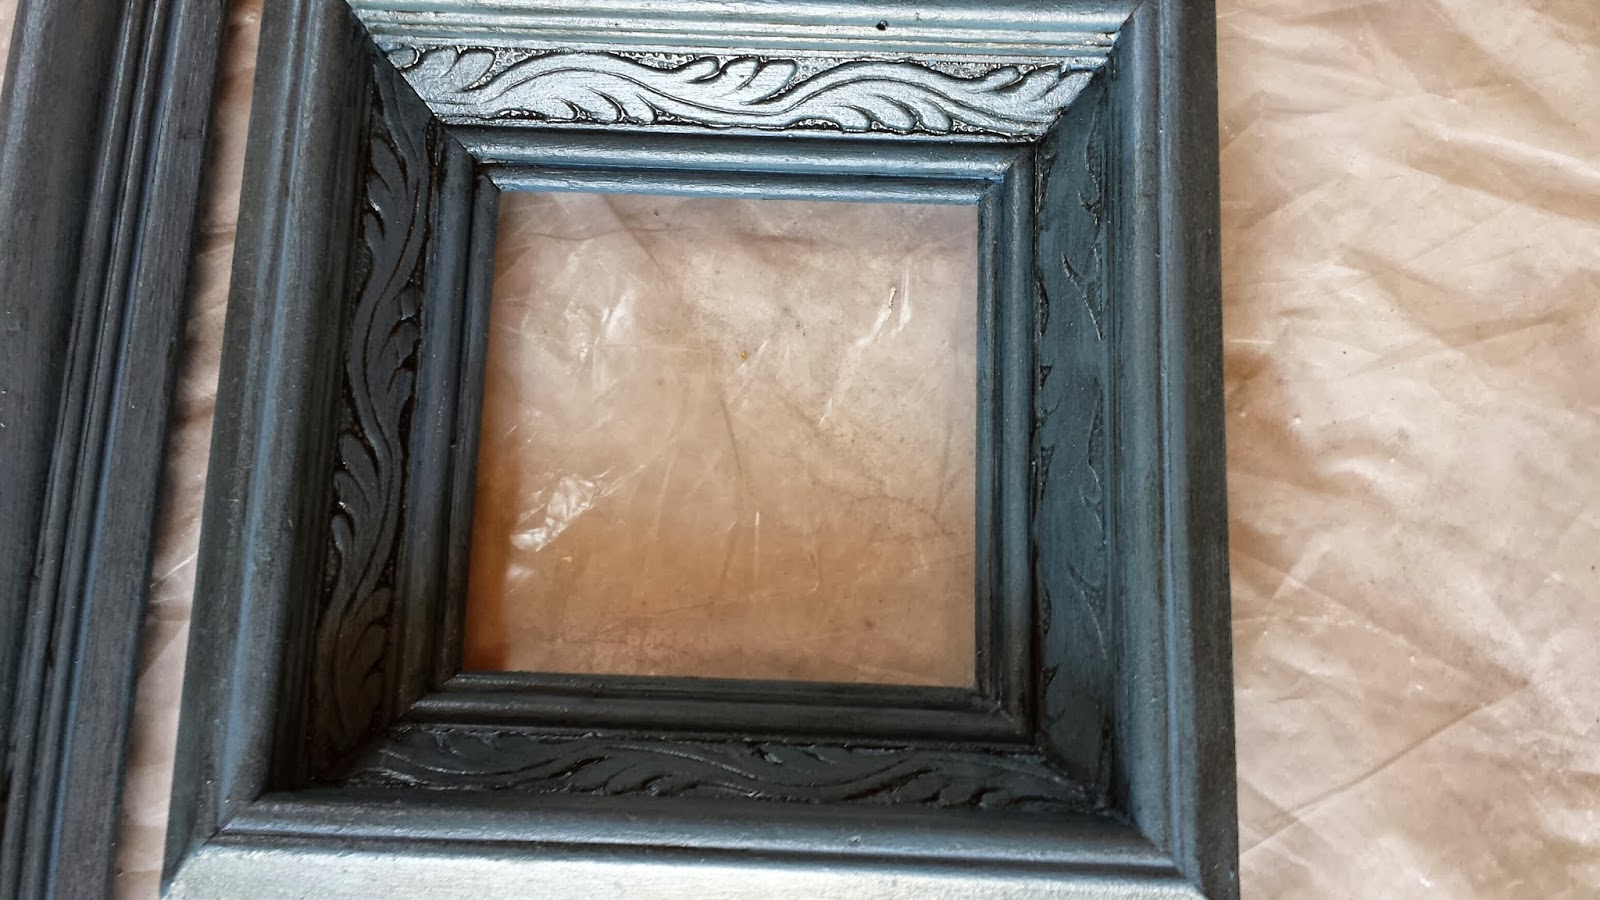
I set about keeping my eyes open for frames at flea markets, garage sales, thrift stores etc.  I found three decent sized frames for $3 each and then raided the frame section at the thrift store during their 1/2 off sale. I ended up with 7 frames of varying sizes and shapes for less that $15.  I really should have taken a picture of them all before painting, but I got so excited to start I forgot.

Now the fun part.  I primed them, I like to use Zinsser 123 primer.  It sticks to just about anything without sanding.  Super helpful for making projects move along faster especially since some of my frames had shiny finishes. And there they are.


Next I painted them using the left over paint from our sun room, tying the color from there into the living room.  If you are going to buy paint for this project, I would consider spray paint.  This would have gone much faster with spray paint, but I wanted to use what I had on hand.  Mine needed two coats of paint.  You could stop here if you wanted, but some of my frames had details that I wanted to highlight so I rubbed them down with Valspar's antiquing glaze.  I have no magic solution for getting this right.  Just rub it on and off until you get the effect that you want.   I like a more subtle effect but you could go crazy with it if you want.  Here is my favorite frame with this treatment

Since these are just going to hang on the wall and not be handled, I didn't bother to put a coat of clear coat on them.

Next was arranging them. I traced each frame onto either wrapping, tissue or office paper and cut them out.  Then I hung  these templates on the wall so that I could move them around and be sure  about their placement.


Once I was sure, I marked on the paper where the hangers on the frame would be so that I could get my nails in the right spot. I nailed through the paper and then pulled the paper from the wall.  This worked phenomenally well.

And here they are on the wall.  One less blank wall staring at me and for less than the cost of one small peice of art.  


Tuesday, July 9, 2013

Laundry Bags and Catching Up


So it has been awhile since I posted here, and it has been quite a past ten months.  After I recovered from shoulder surgery in October and started PT for my hyper mobility issues, I went back to work.  Then in April I broke my foot putting me on crutches and unable to work or drive for nearly 2 months.  So here I am unemployed for the summer and with ample to time to be making things for and with my son, who is growing up way to fast.  He also out grew that egg allergy!!!!  No more modifying recipes.  I still have a backlog of recipes to share so I will try to add some from time to time. Since I am back to homemaking, for the time being, (I really did enjoy working until that foot put me out of commission) I thought I would start sharing some of the things I am doing. 

One of the things I learned during my hiatus from this blog is to make chores as simple and easy for myself as possible.  I think this is a good way to live whether or not you had to have your shoulder fixed.  Who wants to spend time and energy cleaning that could be spent playing? One of things I did to make things just a tinsy bit easier was replace my large hamper with two small hampers with bags.  This way my husband and I just sort our laundry as we put it in the hamper.  When one is full, I take the bag out, close it, roll it down the stairs, and wash it.  This way I am not carting laundry up and down the stairs for a day.  I do laundry more often but it isn't as big of a job.

I wanted to implement the same thing for my kiddo.  We do have a laundry shoot from his floor to the basement, but his laundry was getting mixed up with the wet dirty towels from the kitchen and cleaning. I had to bend over repeatedly to sort it all out.  Besides, I want to teach him a little about doing the laundry, responsibility, and independence.  He didn't want anything that would take up to much floor space, and it need to have a bag so I could roll it down the stairs. (I broke my foot carrying a laundry basket down the stairs.  Clearly I was scarred.)

Then I stumbled across this tutorial.  This is a fantastic idea:  laundry bags from a towel and men's pants hanger.  Her tutorial says that you can just throw your lights and darks in the wash together.  I can't quite make that leap, I still sort.  I just made two bags one from a dark towel and one from a white towel. I did run a cord through the pockets so I could close them.  They are ridiculously easy and I made two in less than an hour.  I also washed the towels before I sewed them so that I can just throw them in with the wash to prevent them smelling. Right now they are hanging in my sons closet but you could also put them on the back of the door knob or the wall.  I must say he is doing a great job with it, and it has made my life just a bit easier. 


Friday, September 28, 2012

Eggless Breakfast Zucchini Bread

Most zucchini breads are really more like cakes. While they are super tasty, they are perhaps not the best way to start your day.   This zucchini bread incorporates wheat germ and whole wheat flour for some added protein and fiber and a better start to your morning. It is a modification of a recipe from this blog http://foodforahungrysoul.blogspot.com/ . You could bump up the nutritional value even more by adding nuts if you don't have nut allergies like we do in our house.  All that being said it is still yummy.  My little one loves it, especially sliced and toasted with a little butter.  This makes the equivalent of two loaves.  I usually make one full sized loaf and mini loaves or muffins to put in the freezer and eat later.  YUM!

Eggless Breakfast Zucchini Bread

Ingredients:

1 1/4 cups wheat germ
1 1/2 cups all purpose flour
1 1/2 cups whole wheat Flour
4 teaspoons baking powder
2 teaspoon salt
2 teaspoons cinnamon
1/2 cup applesauce
1 1/4 cups sugar
2 teaspoons vanilla
2/3 cup cooking oil
3 cups (about 3 medium-sized) zucchini, grated

Grease and flour two loaf pans (or equivalent such as mini loaf pans or muffin tins)

In a medium bowl combine wheat germ, both flours, baking powder, salt and cinnamon.

In a large bowl beat applesauce sugar, vanilla and oil until well combined.  Stir zucchinni into the wet ingredients.  Gradually add dry ingredients to wet ingredients stirring until just combined.  Pour into loaf pans and bake at 350 for about an hour, or until a toothpick inserted into the middle come out clean.  (About 45 minutes for mini loaf pans, 20 minutes for muffins.)

Happy Breakfasting!

Wednesday, September 26, 2012

Soon to Come- Zucchini Recipes

Between vacation, the start of school, and a pesky bicep tendon that keeps popping out of place, there hasn't been much activity here for a bit, that will change soon, hopefully.  Our zucchini plants went bananas while we were gone, and we came home to this once it was all harvested.


The biggest one is 2 feet long!!  I gave two big ones away and two "little" ones away.  (These would be large by grocery store standards.)  That left me with 3 large zucchini and one medium one from our CSA.  The big ones were too large to be tasty grilled or stir fried, so I started shredding. I made egg free zucchini "quiche", wheat germ zucchini bread, chocolate chip zucchini bread, and chocolate zucchini bread. I shredded the rest (I ended up with 35 cups of shredded zucchini.) and froze it for future use.  I plan to share these recipes in the coming weeks as I recover from shoulder surgery, to fix that aforementioned bicep tendon. 

I may even have some green tomato recipes as there seem to be a plethora of those on our vines and no hope for them to ripen.

Saturday, August 4, 2012

Super Easy Napkins


Before we moved to Wisconsin, we rarely used paper napkins.  I have a stack of cloth napkins, and we used those at every meal. I just washed them with my regular load of towels.  No extra work. No spending money on paper napkins.  No extra trash produced.  For some reason, it just hasn't worked out that way in this house.  It may be that my son is older and uses more than he used to, the nice laundry shoot that goes straight to the basement where my laundry is out of sight and out of mind, or the inconvenient location of our napkin drawer.  We have only been using them at dinner, not all the time.

At any rate I decided to fix this today.  Our 1920's house has a nifty little breakfast nook where we eat breakfast, lunch, and snacks.  This is where most of the paper napkin usage happens. Out went the traditional paper napkin holder and in went a $0.50 garage sale find basket. 

Next, on to making the napkins.  I can't remember where I saw this idea or I would credit them, but I am going to share it here because it is so brilliantly simple.  I found my son's old red and white gingham curtains in the fabric bin, and cut it into rectangles 15.5"x12.25".  (I used one of my store bought napkins as a template.)  I pulled some threads out of all four sides to create fringe and voila- 7 new napkins.  This was so quick and easy.  I will definitely be buying more gingham in assorted colors so we can have a big stack of napkins for the whole week!  This might even make a nice housewarming gift if you make a dozen or so (or more) and put them in a nice basket with a bow.  Just a thought.

When I used up all my gingham, I started looking for other fabric I could use up in my stash.  I found some Curious George fabric. The purpose for which I purchased it has long been forgotten.  I cut it into rectangles, as well, with the intent of doing the same thing to them.  I realized that the fringe was not going to look quite as quaint on the print as it did on the gingham. I was not in the mood to fold over hems and press and pin and miter corners or line up square corners.  I wanted napkins, and I wanted them fast. Low and behold, I found plain red fabric in my bin as well.  I cut the same size rectangles out of the red, put the right sides of my print and my solid together, and sewed the edges with a 3/8" seam allowance, leaving a 4" opening to turn the whole thing right side out.  Before turning it right side out, I trimmed the corners.  Once it was right side out, I gave the edges a quick press, being sure to turn fabric under at the opening, and top stitched around the edges.


My little one was so excited about these napkins.  He kept trying to find a reason to use one.  I may just have to find some other fun fabric for these too.  You can never have enough napkins when you have a little boy!


Wednesday, July 25, 2012

Mostly Homemade Creepy, Crawly Boys Birthday

Last week was pretty much been consumed with planning and preparing my kiddo's birthday party.  Since I created the cake, invitation and some of the games, I thought I would share.

First the invitation.  I love publisher for this kind of stuff.  I started with a template and just changed out the clip art and words to fit our party.  Here is what I come up with:


The only problem is these never seem to fit in a regular envelope.  Since I had to send these through snail mail, they needed envelopes. I created my own by folding letter sized paper using "the tape method" found here.


Games are a must to keep 7 little 5 years old out of trouble for an hour and a half.  We started our party with visor and paper bag decorating so that there would be a simple activity to keep everyone engaged while we waited for the rest of the guests to arrive.  Also, everyone would have a hat for sun protection when we went outside.  The visors were 3/$1 at the Dollar store.  I found turtle and frog stickers, star stickers, and our own markers for this activity.

Next was the scavenger hunt.  I hid one frog, lizard, snake, and bug house (dollar store again) per child and gave each kid a scavenger hunt sheet (also created in publisher) and a crayon.  The kids looked for each item, put it in their bag, and marked it off their list.  This went really well.  The kids helped each other out.

cut page in half to produce 2 sheets

Next, we took our bug houses outside to look for bugs.  I also had some shovels for digging and a bug net for this activity.  The kids had a great time with this, and it was easy pickin's due to the influx of lake flies.

We headed back inside for a game of Frog Hoppin'.  All I did was print out three large lilly pads from clip art, tape them to some pots from my kitchen, and put prizes in each pot.  I found green ping pong balls 6/$1 at walmart.  The kids stood in a line and took turns trying to bounce the "frog" (the green ping pong ball) onto the lilly pads (the pots).  When they got one in the pot, they picked a prize.  This was more difficult than I had anticipated for this age group, so we just moved the pots closer.

Next was the cake.  My birthday boy wanted a snake cake.  I looked on several blogs and birthday cake instructionals and came up with my own version.  I used this egg free chocolate bundt cake recipe minus the chocolate glaze.  I let the cake cool. Then put it in the freezer for about 15 minutes so it would be firmer for shaping.  Once I pulled it out, I cut it in half.  Then I put the two halves together to form an "S" shape, and used a serrated knife to shape one end into a pointed tail.  I rounded the other end and used the pieces I shaved off to form a head. I held the head together with tooth picks.


I iced the cake with a simple butter cream frosting tinted green. Frosting cakes is not my strong suit.  They always come out crumby.  This time I frosted it once, this layer of icing had crumbs running through it, as usual for me. I put the cake back in the freezer for another 15 minutes.  Then I frosted it again. This second layer of frosting came out much better.  I used two marshmallows and black gel writing icing for the eyes, a fruit leather for the tongue, and skittles to decorate the rest of the cake.  All of which were egg and nut free!  It is totally possible to make fantastic fun treats that are allergy friendly.


We only had a few minutes left after cake, so while we waited for the party to disperse, we did flyswatter relay races.  I found a pack of two swatters at the dollar store, again.  My son had a couple plastic flies in his collection of animal toys.  I split the kids into two groups, and they took turns carrying the fly on the swatter to one end of the room and back.  If the fly fell off, they had to stop and put it back on the swatter.

Everyone went home wanting more time to party, which tells me it was just about the right length.  Always leave them wanting more, right?  Most important, the birthday boy had a great time!


Hope this helps you plan a fantastic mostly homemade party for your own little one!


Saturday, July 14, 2012

Button and Ribbon Topped Curtains

I had been thinking, for awhile, that my sewing room (which is really just a big landing at the top of the stairs) needed some curtains to give a pop of color to the room.   Once we cut down the tree that provided shade to that side of the house, the need was no longer about aesthetics but temperature control.  I had some fabric I found in the clearance bin that needed a purpose, some ribbon to use up, and black buttons. Voila- my curtains were born! 


Supplies:
Fabric
Lining
Buttons
Ribbon
Thread

This is basically a tab back curtain, with two lengths of thin ribbon creating the tabs in front instead of the back. The finished product should be 1 1/2-2 times the width of the window and however long you would like.  I made mine to fit the whole window, but you could certainly make these as valances or cafe style curtains.  Cut your fabric an inch wider and an inch longer than you want your finished product to be.

The ribbons will create the "pocket" for your curtain rod, so the length your ribbons need to be will vary with how thick your rod is.  I had a very thin rod, and cut mine 3 1/2" long.  Be sure you cut the ribbon longer than you need.  You will be able to trim the excess later.

Generally, tabs should be spaced 6-8 inches apart. Since my ribbons were so thin (1/8"), I spaced them closer for more support and visual appeal. Two ribons spaced about 1/16" apart created each "tab".  I just eyeballed this.  I placed my first and last set of ribbons 1 1/2 inches from each edge and spaced the rest 4 1/2 inches apart. When laying this out, put your fabric right side up, and pin your ribbons right side up as well.


Next take your lining, and pin it so that the right side is down.  The right side of the fabric and the right side of the lining should be together.  Pin this, and sew 1/2" seem around the edge leaving a 5" opening at the bottom so you can turn it right side out.  After you sew it, trim the corners and turn it right side out.


Iron the edges. Be sure to fold under your opening as it would be have been had it been sewn.  Fold the ribbons so that they come straight down on top of your fabric, and iron a crease. 


Top stitch the entire perimeter of the curtain at 1/4".  As you stitch over the ribbons be sure they are laying straight.


Next determine how wide your "pocket" needs to be for your rod.  I had a thin rod, so a 1" pocket was wide enough for me.  Mark a line 1" (or whatever width you need) from the top stitch line.  I used pins at ever ribbon to mark this.  You could also use a fabric pencil if you wanted.  Sew a line along your marks.  Again, be sure the ribbons are laying straight as you sew over them.  Once you have done this, trim the ribbon below this stitch so that when you sew your buttons on, they cover the ends.


Sew your buttons on to cover the ribbon ends. 


Then hang your curtain.


One thing to keep in mind with this style curtain, is that your rod will show.  You need to have a rod you don't mind seeing.  Also, this would have been so much easier if I had used one length of wider ribbon at each "tab."  If you are buying supplies, and not just looking to use up sewing supplies, I would buy 1/2" wide ribbon, and use one length to create each tab.  If you do use thin ribbon, as I did, you may want to shorten your stitch length a bit.  I did not do this on my first curtain and a couple ribbon lengths managed to slip between stitches and not get secured when sewing the first seam.  I left them in place, ironed them (unsecured), shortened my stitch length, and made sure I caught them when I did the top stitching.

I think this curtain could be really fun with different shaped and colored buttons.  You don't have to used buttons either.  Any embelishment that covers the ribbons' ends would work.  Fabric roses or rosettes could be really sweet for a little girls room.  Happy sewing!

Friday, July 6, 2012

Bluberry Nectarine Pie


I love homemade fruit pie!  There is just nothing quite like it.  Store bought stuff just can't compare.  Some summers I make a pie a week, but not this summer.  It has just been too hot, my rhubarb didn't do well, and the fruit selection has been expensive or not very good. Bummer! The 4th of July just isn't the same without a pie, though, so I cranked up the a/c and got to baking.  I still ran into the same problem with the fruit.  Add to that, everyone wanted something different (rhubarb, peach, blueberry), so I got creative.  Blueberries and nectarines.  I love mixing fruits in pies!
 

Start with a double pie crust, whatever recipe works for you. Most recipes don't have egg in them, but a few do.  So if you want the pie to be egg free, be sure to select one without eggs.  I love the flaky pastry recipe from The Joy of Cooking.  I use half shortening and half butter, so I get the great flakiness from the shortening and the yummy taste of the butter- best of both worlds!  I also add 1/4 cup powdered sugar to the dry ingredients instead of the teaspoon of granulated sugar.  It adds a nice hint of sweetness for fruit pies.

When making pie crust, the key is fast and cold.  Your butter and water need to be very cold.  I put ice in my water, and work fast.  This is in part, so things don't warm up, but also you don't want to overwork the dough.  Ice water is also your friend when rolling out your dough.  Any tears can be patched by pressing the dough together with a little ice water as glue. Although, in my opinion, a perfect looking crust is not important; you can get that from a store bought pie.  What matters is taste and texture. I also like to roll out my dough, put my bottom crust in the pie pan, and put the pan and the rolled out top crust back in the fridge while I make my filling. That way the crust is nice and cold when it goes into the oven. Once you have your crusts and pan prepared, make the filling

Blueberry Nectarine Pie Filling:

3 cups blueberries
2 cups nectarines sliced (I left the skin on and nobody was the wiser)
3/4 cup sugar
3 1/2 tablespoons cornstarch
1 tablespoon lemon juice
1/8 teaspoon salt
2 tablespoons butter cut into small pieces


Preheat oven to 425 degrees.  Mix everything but the butter in a large mixing bowl.  Let sit for 15 minutes, stirring occasionally.  Pour filling into prepared bottom crust. Work fast after this; you don't want the filling to make your crust soggy before you get it in the oven. Dot the top of the filling with the small pieces of butter.  Brush the edge of the bottom crust with ice water, place the top crust on top.  Trim crust as needed and seal bottom and top crust.  Cut vent holes and place in the bottom 1/3 of the oven at 425 degrees. Bake for 30 minutes.  Then place a cookie sheet under the pie pan (I usually put my pie shield on now too) and drop the temperature to 350 degrees and continue baking for 30 minutes or until thick juices begin to bubble from the pie.  Remove form the oven and let cool on a wire rack before serving.

This pie was quite tasty.  In the future, I would use fewer blueberries and more nectarines.  They got a little lost in the blueberries, but nobody at our house was complaining.  Prep was super easy too, since nothing had to be peeled.  Happy pie baking and eating!


I do really LOVE to bake pies.  I think it is becoming a lost art. So if you have nay questions about crusts and/or pies, feel free to ask.  I would love to try to help!

Monday, June 25, 2012

Quick, Eggless, (and Totally from Scratch) Strawberry Cake


My first attempt at this was an utter failure.  I substituted sour cream for the eggs, added some extra baking powder, macerated the strawberries before I pureed them. I really tried to jazz it up.  The batter tasted like strawberry ice cream.  I thought I was on to something, but then... It didn't rise, not even by a hair.  I had a strawberry brick.

This time around I thought I needed to employ the K*I*S*S strategy-Keep It Simple Stupid.  I started with a simple busy day cake recipe and just substituted a simple strawberry puree for the eggs with a little extra baking powder and ta-dah: Success!  The cake rose nicely and had actual (not fake) strawberry flavor through out.  It isn't that strawberry pink color that the boxed mix is, but that didn't bother me.  All that comes from artificial junk, none of which is in this cake, and isn't that part of the point of doing things from scratch.  I didn't bother to ice it, but I am sure a little strawberry cream cheese frosting would turn this simple cake into something special.  I saved this for a book club meeting a couple days later and used it as the base of strawberry shortcake.  It was a big hit!

I am sure you could double this as well and turn it into a nice layer cake.  I am also thinking about all the fruit possibilities: peach, apricot, raspberry... If you experiment and have success let me know.

Quick, Eggless, (and Totally from Scratch) Strawberry Cake

Ingredients:

1 1/3 cups all-purpose flour
2/3 cup sugar
2 1/2 teaspoon baking powder
2/3 cup milk
1/4 cup butter, softened
1 cup fresh strawberries halved
1 teaspoon vanilla

Combine flour, sugar, and baking powder in a bowl.  Puree the strawberries. My 1 cup of halved strawberries turned into just over a 1/4 cup of puree.  Add milk, butter, vanilla, and 1/4 cup of strawberry puree to the bowl. (If you have an extra teaspoon or two of puree go ahead and that too. Any more than that and save it for something else, like frosting.)  Beat with an elictric mixer on low until the mixture is combined.  Then beat on medium for one minute.  Pour into a greased and floured 8 inch cake pan.  I also like to put parchment in the bottom, so it releases more easily.  Bake in a 350 degree oven for 25 minutes or until a toothpick inserted in the middle come out clean.  Cool for five minutes and remove from pan and cool thoroughly before frosting, if you desire

ENJOY!


Tuesday, June 19, 2012

Eggless Orange Rhubarb Muffins

Last week we got our first Community Supported Agriculture (CSA) box of food from Olden Produce in Ripon, WI.  The email they sent out letting us know what we were going to receive mentioned rhubarb.  I had visions of  bunches and bunches of rhubarb.  I was planning pies and preserves.  I don't know why.  Our rhubarb at home has done pretty poorly due to the early hot, dry summer.  Did I think they had some magic rhubarb at the farm?  I don't know.  What I do know is that we only got 3 stalks of rhubarb.  Not enough for one pie, or half a pie, or half a strawberry-rhubarb pie.

What to do with this rhubarb?  So I got to thinking; the one thing that hardly ever goes uneaten at our house is muffins.  I started looking for recipes for inspiration and came across Orange-Rhubarb Muffins at the Rhubarb Compendium online.  Perfect!  I love citrus with rhubarb.  The two flavors play so well together!  I always add a little orange zest to my rhubarb pie.  What could be better?

So here is my egg-free, nut-free version. (This one also happens to be milk-free.)  I also tweaked the amount of rhubarb.  They came out just about perfect.  Everyone enjoyed them, even my hubby who is not in love with rhubarb in quite the same was as my son and I are.

Eggless Orange Rhubarb Muffins

2 cups all-purpose flour
3/4 cup sugar
2 teaspoons baking powder
1/2 teaspoon baking soda
1 teaspoon salt
1/4 cup applesauce
1/4 up vegetable oil
zest of one orange or to taste
3/4 cup orange juice
1 cup rhubarb, finely chopped

Preheat oven to 350 degrees.  Prepare muffin tin by either lining with paper liners or coating with non-stick cooking spray.  When making muffins without eggs, I prefer to use cooking spray.  For some reason eggless muffins don't seem to come out of the paper liners very well, making a mess and leaving everyone feeling cheated because half the muffin is still on the paper.  If you coat the muffin tin well, including the top, they should slide out nicely.

Combine the first five ingredients (the dry stuff).  Mix the applesauce, oil, and orange juice until well blended.  Add this to the dry ingredients.  Stir to combine being careful not to over mix.  Fold in the rhubarb. Spoon into muffin tins, and bake for 25-30 minutes until a toothpick inserted into the center comes out clean.  Let cool for about 5 minutes, and then remove from the tin and place on a wire rack to continue cooling.

ENJOY!!!!


Sunday, June 10, 2012

Mason Jar Straw Lids


After I made a dish soap pump from a mason jar, I got to thinking about other things I could use them for.  They are so ubiquitous and inexpensive, especially at the thrift store on half off day.  While I was using one to drink from, I thought, "I need to put a hole in the lid so I can stick a straw in it."  Then the problem of the sharp edges around the hole quickly made itself apparent.  Enter the RUBBER GROMMET, found in the "hard to find" drawer of small parts at the hardware store.  For an extra $0.30 I had my solution.

You will need:

Mason jar, lid, rim
Drill bit 3/8"
drill with clamps/ vice or drill press with clamps
wire cutters
rubber grommet- diameter of  9/16" (pictured below)


Set your lid on your drill press and clamp it down so that the bit hits the center of the lid.  If you are not lucky enough to have a drill press lying around, (I don't think any of my friends do) you will need either gently clamp the lid in a vice, you don't want to crush it, or clamp it to the edge of a table so that it is secure but the area of the lid you want to drill is hanging off the edge of the table.  Now drill your hole.


Once you are done, the back edge of the hole will probably have some sharp edges hanging off.  Take the wire cutters and trim as much of it off as you can.


Now work your rubber grommet into the hole.  I usually come at it from the side.  Once it's done, give it a good washing, fill your mason jar with your beverage of choice, screw on your lid and rim, insert straw and enjoy.


I love these.  The lids are interchangeable between sizes, so I can put one on an 8 ounce jar for my kid or, on a hot summer day (like today), a big quart size one for me. Not only do they make your jar a spill resistant cup, but they keep the bugs out of your lemonade. They would be fun for parties.  You could paint the jars for favors or just to make them more festive. I have also run these lids with the grommets through the dishwasher without any ill effects so far.